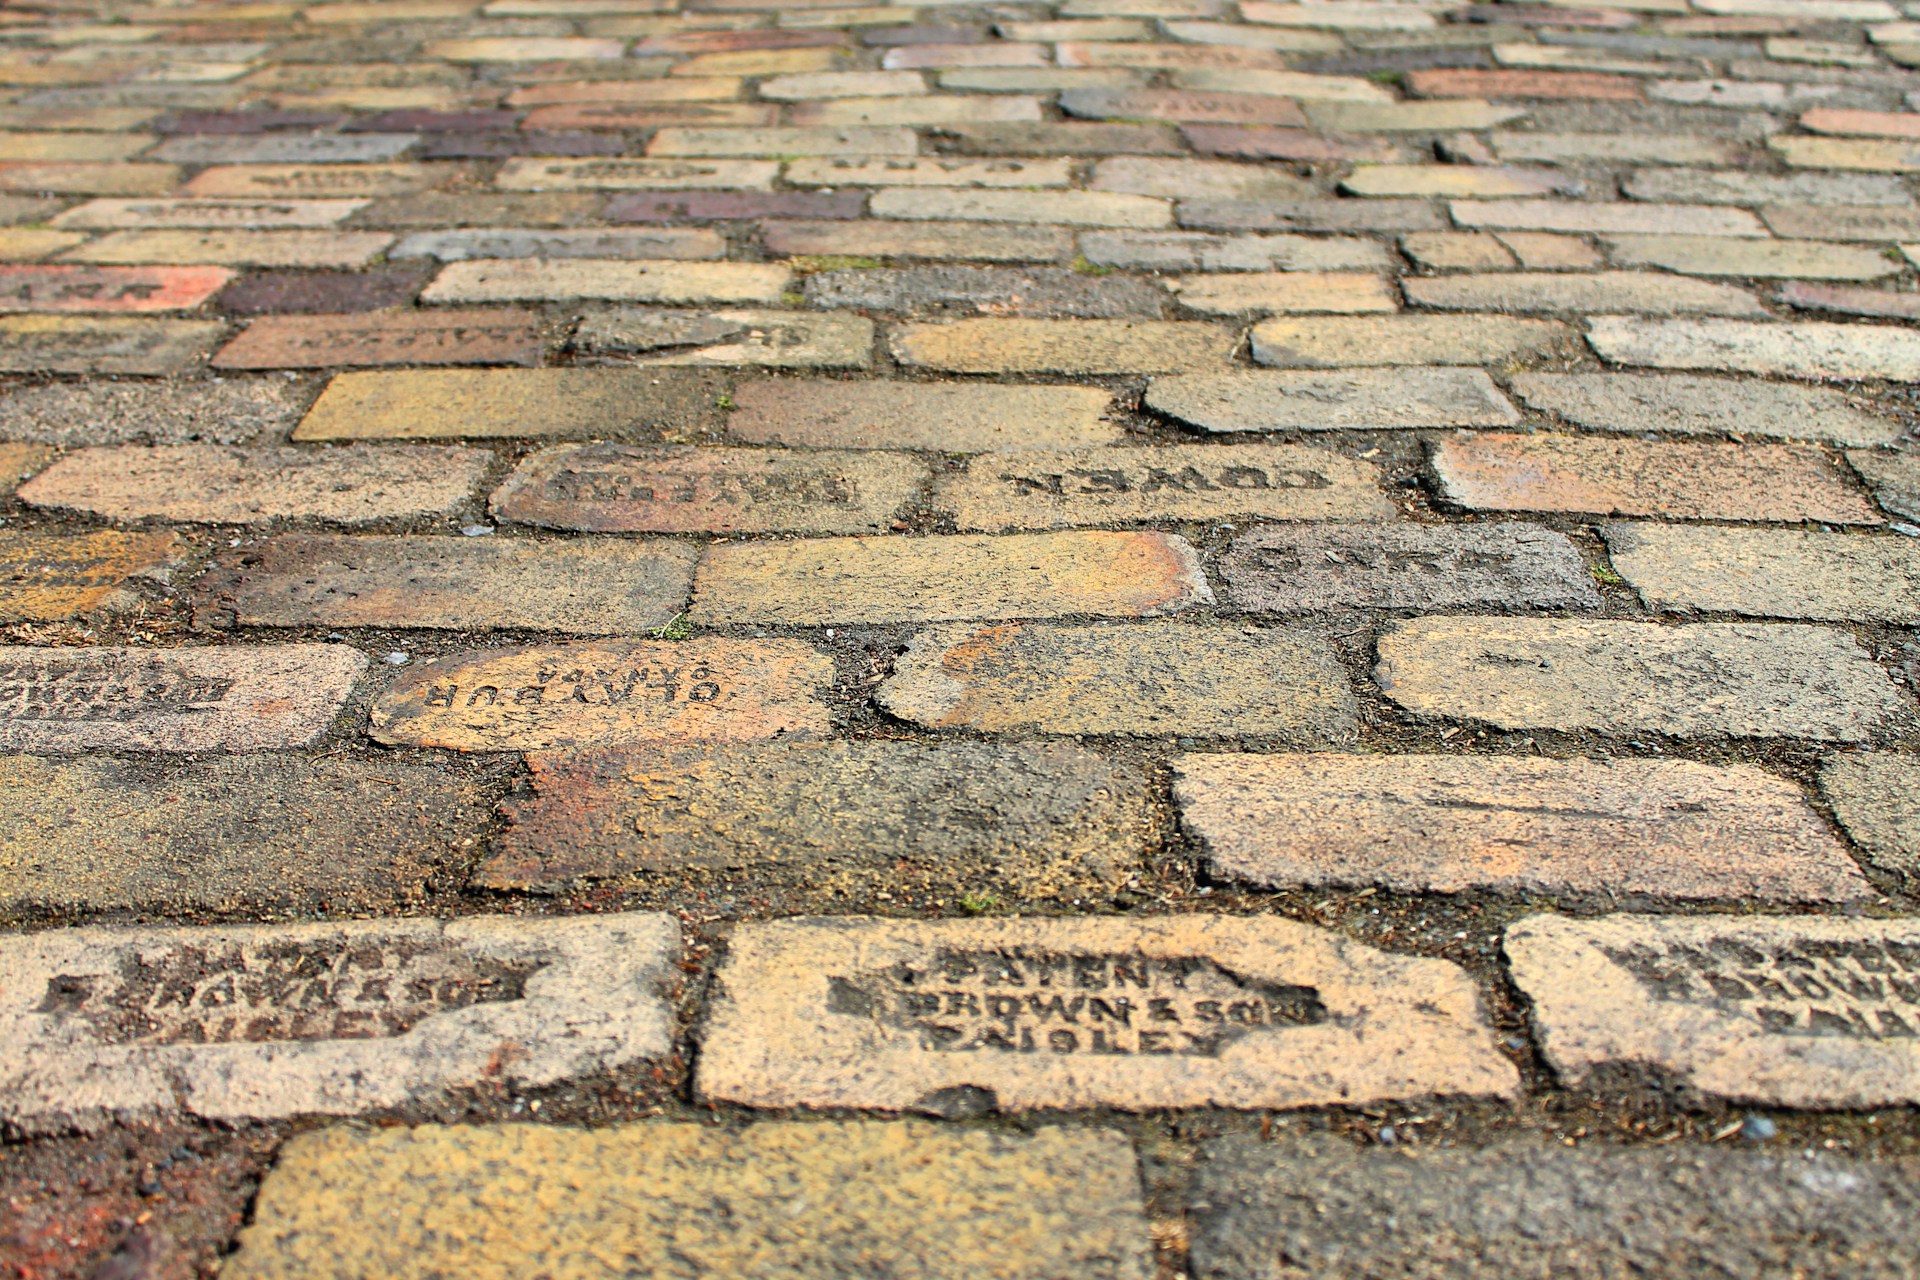
Reclaimed stone transforms any project with authenticity, texture, and history. Its unique imperfections—soft edges, subtle tones, and natural patina—add unmatched visual depth to interiors and landscapes.
At New Orleans Brick & Stone, we source genuine reclaimed stone from historic American sites, preparing each piece for reuse while preserving its natural character. Builders, architects, and homeowners rely on these materials for their lasting beauty and structural integrity.
This guide explains how to install reclaimed stone properly, from site preparation to finishing and maintenance. Learn how to achieve a timeless, professional result that honors both craftsmanship and heritage.
Key Takeaways
- Proper site and surface preparation are essential for lasting reclaimed stone installations.
- Use appropriate tools and techniques to maintain the stone’s authentic look and strength.
- Planning and understanding the material’s history improve both the installation process and the final result.
Understanding Reclaimed Stone
Reclaimed stone brings deep history and unique charm to your project. Knowing the types available, their benefits, and how to source them helps you make informed choices.
Types of Reclaimed Stone
Reclaimed stone includes limestone, sandstone, granite, and bluestone. Each type offers distinct textures, colors, and durability for different uses. Thick flagstones suit patios, thin veneer stones work for walls, and granite blocks are ideal for foundations.
The aged surface stands out—it tells a story through weathering patterns and color variations. Consider the original environment, as moisture and wear affect long-term performance.
Benefits of Using Reclaimed Materials
Reclaimed stone brings authentic history and unmatched character to your space. These materials are often denser and more durable, having survived decades of weathering.
Reusing stone reduces environmental impact by cutting down on quarrying and waste. Distinct textures and patinas develop naturally, giving your project a timeless appeal that new stone can’t match.
Sourcing Authentic Reclaimed Stone
Find genuine reclaimed stone through trusted suppliers who know how to evaluate and prepare old materials. They inspect each piece for structural integrity, ensuring it withstands installation and use.
Check inventory availability to avoid project delays. Ask about testing methods, the material’s history, and whether samples are available. This ensures your reclaimed stone fits your design and functional needs.
Planning Your Reclaimed Stone Installation
Start your reclaimed stone project by understanding your space, choosing stones that fit both function and style, and accurately estimating material needs. These steps ensure a smooth installation that matches your vision.
Assessing Project Requirements
Define the purpose of your stone installation—fireplace, patio, or garden wall. Each use requires a different thickness, durability, and finish. Knowing this early helps you avoid mistakes.
Consider environmental conditions like moisture, freeze-thaw cycles, and foot traffic. This guides your stone selection. For example, flagstone works well outdoors, while thin veneers are better for interiors.
Think about the style and scale of your project. Reclaimed stones have unique textures and colors, so matching your design with the right materials ensures authenticity and character.
Selecting Appropriate Stone Pieces
Choose stones that fit your project’s structure and aesthetic. Reclaimed stone varies in shape, size, and patina, so hand-select pieces that complement each other.
Focus on durability by picking stones rated for your installation type. Some reclaimed stones may need extra sealing or prep in wet or high-traffic areas.
Mix shapes for a natural look or use uniform sizes for a cleaner finish. Select stones with the right color and texture to reflect a historic, timeless feel.
Measuring and Estimating Materials
Measure your installation area carefully—length, width, and depth. Add 10-15% extra material for cutting waste and fitting adjustments.
Track your materials in a simple table:
Area (sq. ft.)
Stone Type
Estimated Qty (sq. ft.)
Extra Material (%)
Total Needed (sq. ft.)
Example: Patio
Reclaimed Flagstone
200
15%
230
Calculate total square footage, then convert to the number of stones or weight based on supplier specs. Confirm availability to avoid delays. Ordering correctly keeps your project on schedule and budget.
Preparing the Site
Before laying reclaimed stone, make sure your site can support the material’s weight and preserve its character. Proper groundwork protects the stone and ensures a long-lasting installation.
Cleaning and Clearing the Area
Remove all debris, old materials, and vegetation from your site. Clear the surface completely to prevent future shifting or damage. Check for roots or weeds that could grow through and disturb pavers or walls. Use a stiff brush or pressure washer to clean dirt, grease, or mold from existing surfaces.
A smooth, clean foundation helps your reclaimed stone settle evenly for a professional finish. Don’t rush this step; leftover material can cause unevenness or long-term issues.
Inspecting for Structural Soundness
Check the ground or wall base for cracks, weak spots, or erosion. Tap walls with a hammer to find loose areas. For patios, test soil stability by digging a small hole. If the soil is soft, compact or patch it to prevent settling that could crack or shift your stone.
Repair any damage before you begin. This ensures your reclaimed materials hold firm and retain their historic integrity. Contact a structural expert if you’re unsure about major issues.
Addressing Drainage and Foundations
Good drainage is critical. Reclaimed stone needs well-drained foundations to avoid water pooling, which causes damage over time. Grade your site so water flows away from the installation area.
Install gravel or crushed stone as a base layer to improve drainage and provide a solid foundation. For walls, use mortar mixes and backing materials that control moisture. Following these steps prepares your site for a durable, authentic reclaimed stone installation.
Tools and Materials Needed
To install reclaimed stone well, you need the right tools, safety gear, and materials. Each one helps you achieve a durable, authentic finish that honors the stone’s history.
Essential Installation Tools
Use a masonry chisel and hammer to shape stones. A wet saw or angle grinder with a diamond blade helps cut stones while keeping their edges intact.
Level and tape measure ensure even surfaces and consistent joints. Use a trowel for applying mortar, and a mixing bucket and paddle for making mortar. Rubber mallets help tap stones into place gently, and chalk lines mark straight guidelines for your layout.
Recommended Safety Equipment
Protect your hands with sturdy work gloves. Wear safety goggles to shield your eyes from chips or dust when cutting or chiseling stone.
Use a dust mask or respirator to avoid inhaling silica dust, especially when using power tools. Wear steel-toed work boots to protect your feet from dropped stones. Ear protection is helpful when working with loud tools.
Supplementary Materials
Choose high-quality masonry mortar designed for reclaimed stone. It should match the stone’s porosity and color for a natural look. Use jointing tools like a pointing trowel or jointer for neat mortar joints. Keep water handy for mixing mortar and cleaning stones during installation.
Consider a stone sealer suitable for reclaimed materials to protect your installation from stains and weathering once the mortar cures.
Surface Preparation and Layout
Proper surface preparation is key to a durable reclaimed stone installation. Stability, clear layout plans, and dry fitting help avoid mistakes and ensure a seamless finish.
Creating a Stable Base
Start with a clean, level surface. For outdoor projects, compact a 4-6 inch layer of crushed stone or gravel for drainage and to prevent shifting. Use a plate compactor for even compression.
For indoor or concrete surfaces, clean thoroughly and apply a suitable mortar or thinset for reclaimed stone. Check for evenness with a level and fill low spots as needed.
Arranging Stone Layouts
Sort stones by size, shape, and color before starting. This helps you visualize your pattern and maintain consistency. Plan to balance different textures and hues for character.
Decide on your layout style, such as ashlar, random, or running bond. Use chalk lines to mark reference points and edges. Group stones of similar thickness together to minimize adjustments.
Dry Fitting and Adjustments
Lay out stones without mortar first to check your design and fit. This lets you spot gaps or pieces that need trimming.
Trim stone edges as needed for a tighter fit, using a grinder or chisel. Don’t force stones; fill minor gaps with mortar or sand. Walk the layout to spot uneven areas and adjust before the mortar sets.
Installation Techniques for Reclaimed Stone
To install reclaimed stone well, use the right methods for setting, securing, and shaping each piece. Careful installation preserves the stone’s historic character and ensures it lasts for years.
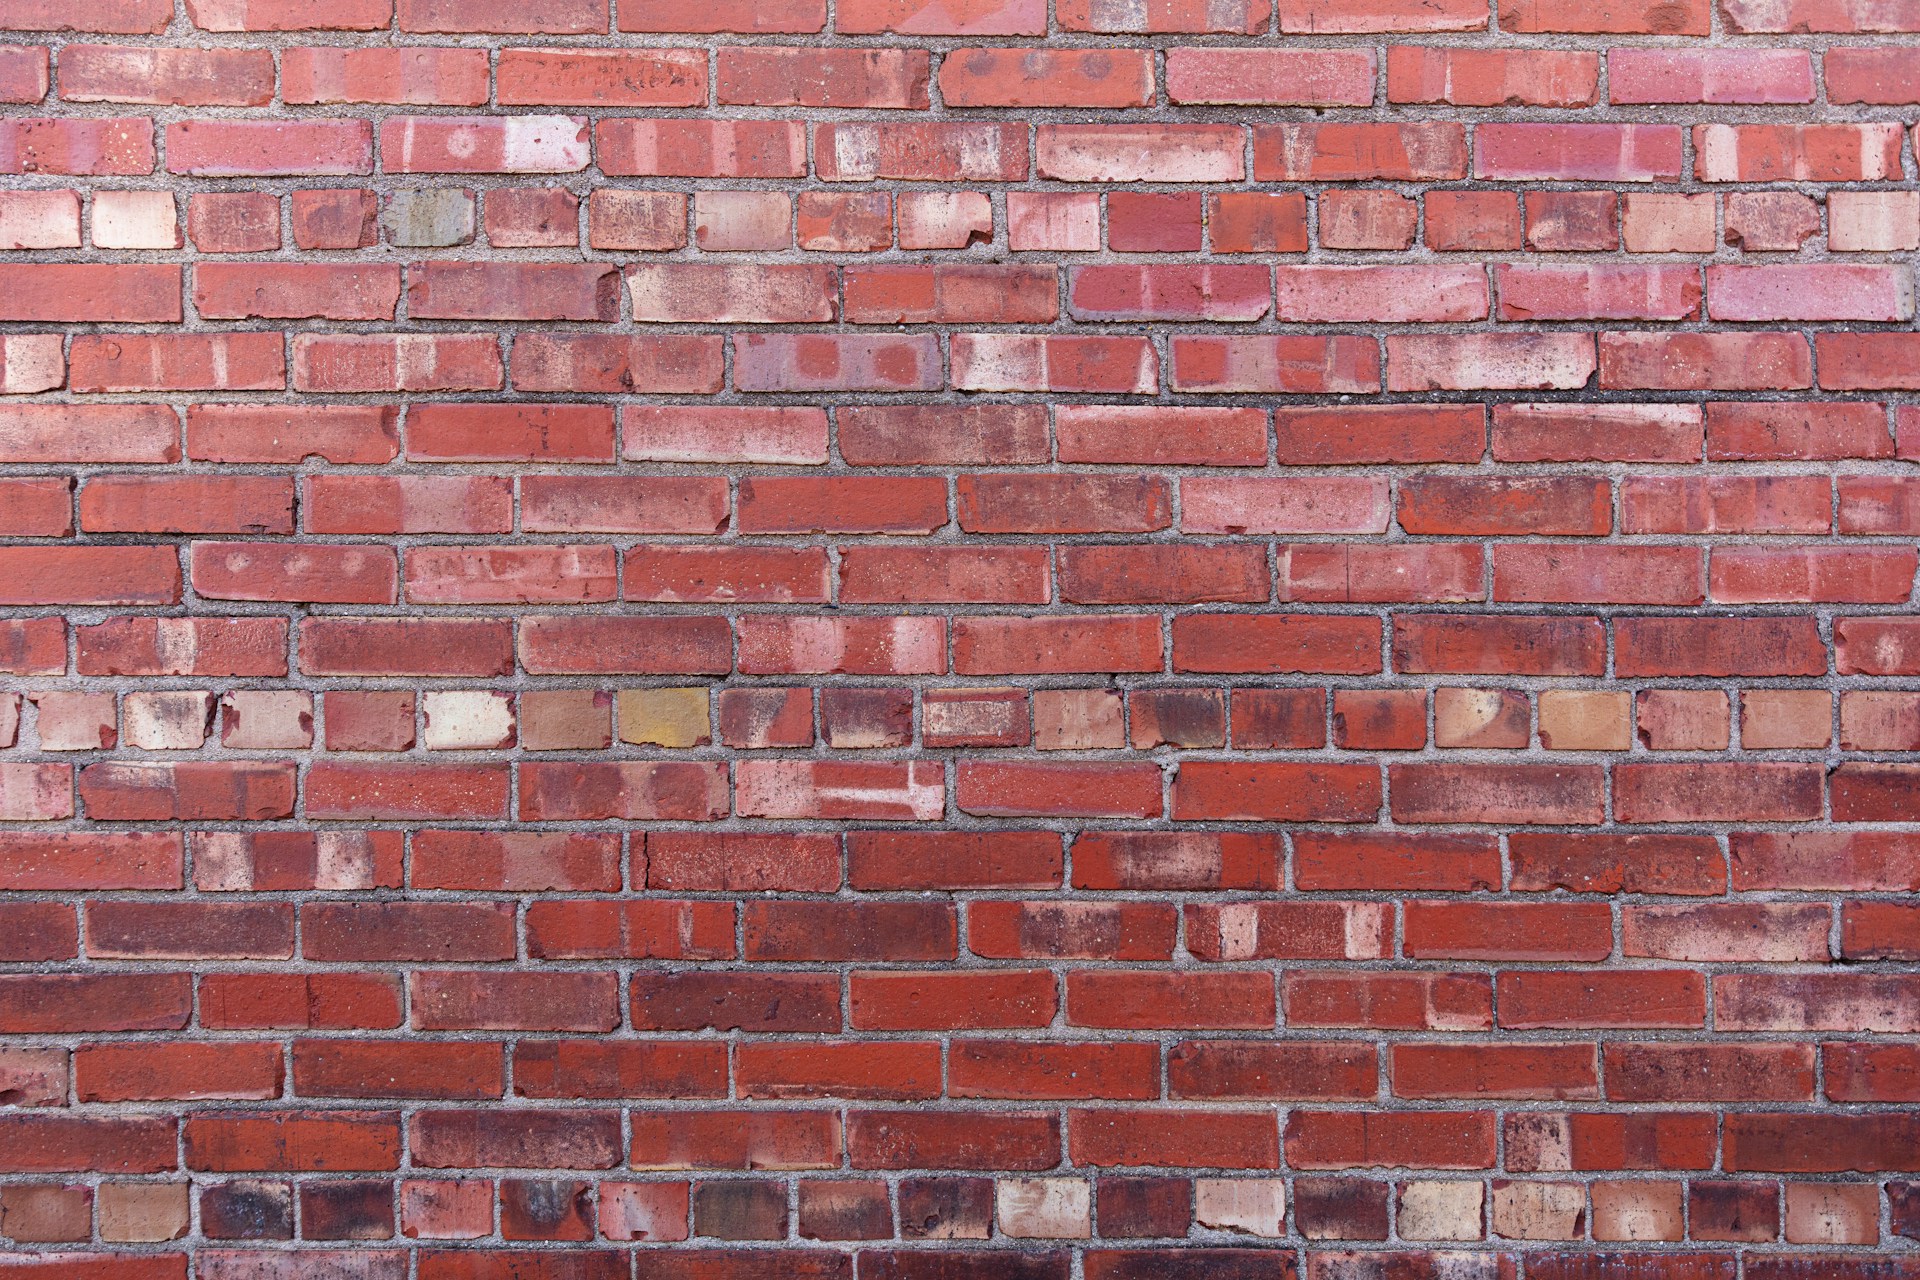
Mortared Stone Installation
Mortared installation uses a cement-based mix to hold stones firmly. Clean the stone surfaces to remove debris and dust for better adhesion. Spread a layer of mortar on the wall or foundation, then press each stone into place, keeping joints about ½ inch wide.
This spacing maintains strength and highlights the stone’s texture. Use a pointing tool or trowel to smooth the joints, creating a tight, sealed finish that protects against moisture and enhances the stone’s natural look.
Dry-Laid Stone Techniques
Dry-laid stone relies on gravity and precise fitting, using no mortar. Select stones that nest well, using flat surfaces and different sizes for stability. Create a level base with compacted gravel or sand. Place the largest, flattest stones first, then layer smaller stones, filling gaps with stone chips or sand for support.
This method allows the stone to breathe and reduces moisture buildup. Dry-laid stone is ideal for garden walls, patios, and historic restorations with a natural look.
Cutting and Shaping Reclaimed Stone
Reclaimed stone often comes in irregular shapes, so cutting and shaping help it fit your design. Use a diamond blade wet saw or angle grinder for precise cuts without damaging the patina. Mark cut lines clearly with a pencil or chalk. Cut slowly to avoid cracks or chips.
For rustic shaping or small adjustments, use a hammer and chisel. Shape edges carefully for a tighter, cleaner fit. Your craftsmanship brings out the stone’s character and the unique appeal of reclaimed materials.
Setting and Finishing the Stones
Careful handling and precision during installation highlight the authentic beauty of reclaimed stone. Focus on aligning each stone, choosing the best jointing method, and keeping surfaces clean and sealed for long-lasting character.
Positioning and Aligning Stones
Lay out your stones dry first to arrange them naturally. Mix shapes and sizes for an organic pattern that preserves original texture. Use a level and straightedge often to keep stones aligned.
Make small adjustments for a uniform appearance while keeping the reclaimed character. Hand-set larger stones with mortar, filling voids underneath to prevent shifting. Leave slight gaps to enhance natural aging and drainage.
Grouting and Jointing Methods
Pick a mortar mix that matches your stone’s age and porosity. Lime-based mortar lets the stone breathe and prevents damage over time. Apply mortar with a pointing trowel, pressing firmly and keeping excess off stone faces.
Match mortar color to natural stone tones or historic shades for authenticity. Choose recessed, flush, or weathered joints depending on your design. Recessed joints highlight each stone, flush joints create a smooth look, and weathered joints add rustic charm.
Cleaning and Sealing Installed Stone
After installation, clean the stones with a soft brush and water to remove mortar residue. Avoid acid or harsh chemicals that can strip the patina. Let the wall dry before sealing.
Apply a breathable, penetrating sealant to protect against stains and moisture. This keeps reclaimed stone durable and preserves its character.
For outdoor projects, use sealants rated for weather exposure. Your stone will age gracefully and resist damage from the elements.
Troubleshooting Common Issues
When working with reclaimed stone, you might encounter irregular sizes, shifting stones, or uneven surfaces. Knowing how to handle these challenges ensures a stable, attractive installation.
Dealing With Irregular Stone Sizes
Reclaimed stones vary in size and shape, so fitting them together takes patience. Sort stones by size before laying them out. This helps balance large and small stones for a cohesive pattern.
Trim stones that don’t fit with a masonry chisel or angle grinder, taking care not to damage the edges. Fill gaps with compatible mortar or crushed stone to improve stability.
Preventing Shifting and Settling
Shifting often happens when the base is inadequate. Start with a compacted gravel or sand base that drains well. Avoid loose soil, which causes uneven settling.
Firm the base with a plate compactor before placing stones. Fill joints completely with sand or polymeric sand to lock stones together and reduce movement. Inspect the installation regularly and add joint filler as needed to keep it solid.
Addressing Surface Leveling Challenges
Uneven surfaces result from inconsistent stone thickness or an unprepared base. Adjust the bedding layer beneath each stone with sand or mortar to match adjacent stones.
Use a level during placement to keep the height uniform. For larger projects, a laser level helps maintain consistent elevation. If high spots remain, carefully grind down stone edges without affecting the structure or appearance. This keeps your surface safe and balanced.
Maintenance and Long-Term Care
Proper care keeps reclaimed stone looking authentic and durable. Clean regularly and address damage quickly to preserve the stone’s character and structure.
Regular Cleaning Tips
Use gentle cleaning methods to protect the surface and patina. Brush away loose dirt with a soft-bristle brush or broom. For deeper cleaning, use mild soap and water with a sponge or cloth. Avoid acidic or harsh cleaners that can erode the stone or mortar.
Rinse with clean water and let the stone dry naturally. Avoid pressure washing, which can weaken reclaimed materials. Sealing is optional but helpful in high-traffic or exposed areas. Use breathable sealants to maintain the stone’s aging process.
Repairing Damaged Stones
Inspect your stone regularly for chips, cracks, or loosening. Patch small chips with color-matched mortar or stone epoxy.
For loose stones, remove old mortar and reset with fresh mortar, matching the original color and texture. Replace stones only if necessary and use authentic reclaimed material for consistency.
Report structural concerns early to prevent bigger repairs and keep your space safe.
Enhancing the Look of Reclaimed Stone
Bring out the full beauty of reclaimed stone with design choices that highlight its texture and history. Small details can emphasize character and create a welcoming feel.
Incorporating Landscaping Elements
Pair reclaimed stone with native plants and natural materials for an organic look. Use shrubs, ornamental grasses, or ground covers to contrast with the stone’s rugged texture.
Add mulch or pea gravel around stonework to frame the area and keep soil off the surface. Raised beds or stone-edged borders highlight the stone and add dimension.
Integrate weathered wood or iron accents nearby for warmth and heritage. These materials blend well with reclaimed stone for a timeless effect.
Lighting and Decorative Accents
Good lighting turns reclaimed stone features into nighttime highlights. Use warm LED uplighting to accentuate textures and shadows. Path and step lights improve safety and show off the stone’s character at night. Avoid harsh lights that flatten details.
Decorate with vintage metalwork, antique urns, or rustic benches to complement the stone’s history. Keep accents simple so they enhance your design without clutter.
Sustainability and Environmental Impact
Using reclaimed stone reduces the need for new quarrying, helping preserve natural landscapes and lowering energy use. Choosing reclaimed materials supports environmental responsibility.
Reclaimed stone comes from century-old buildings, giving new life to materials that might otherwise become waste. This reuse prevents landfill debris and lowers your project’s carbon footprint.
- Reduced extraction and transportation emissions
- Preservation of natural resources
- Less construction waste generation
Reclaimed stone is durable and often outlasts modern options, so you need fewer replacements over time. Its character connects your project to heritage and promotes sustainable values.
Using reclaimed stone lets you build with a sense of history while making eco-friendly choices that honor both the environment and architectural legacy.
Circular Design and Sustainable Reuse
Insights from ArchDaily highlight reclaimed stone as a cornerstone of circular architecture—minimizing waste, reducing embodied carbon, and promoting responsible sourcing.
By reusing historic materials, builders preserve cultural value while contributing to a low-impact construction model that benefits both heritage and the planet.
Building Enduring Beauty with Reclaimed Stone
Reclaimed stone installation is both an art and a commitment to heritage. With thoughtful preparation, craftsmanship, and respect for each piece’s past, you create surfaces that endure for generations.
New Orleans Brick & Stone provides authentic reclaimed materials carefully cleaned, graded, and ready for installation. Every stone carries the story of American architecture, ready to enhance your home or landscape.
Visit our website to explore reclaimed stone options and talk with our experts about installation techniques that bring lasting beauty and authenticity to your project.
Frequently Asked Questions
Proper preparation, foundation, and materials are key to a successful reclaimed stone installation. Good edging and laying techniques protect your project and ensure lasting results.
What are the essential preparation steps for laying reclaimed stone?
Clear the area of debris and vegetation. Excavate to a uniform depth, usually 6-8 inches. Compact the soil, then add a layer of crushed stone or gravel for drainage and stability.
Can you lay cobblestones directly on soil, or is a foundation necessary?
A foundation is necessary. Laying cobblestones directly on soil causes shifting and uneven surfaces. Use compacted gravel and a sand layer for stability.
What is the recommended mixture for a dry lay installation of cobblestone pavers?
Use a blend of sharp sand and fine gravel, about 2:1. This supports the stones and allows water to drain. The sand fills joints during compaction.
What are some effective techniques for installing cobblestone edging?
Set edging stones in concrete to prevent movement. You can also use steel or plastic edging pinned alongside compacted gravel. Keep edges level and flush with the cobblestones.
What's the best process for laying a reclaimed stone cobblestone driveway?
Excavate and compact the base with at least 8 inches of gravel. Spread a 1-2 inch bedding layer of coarse sand. Lay stones tightly, tap into place with a rubber mallet, and fill joints with sand or polymeric sand for stability.
Is it possible to set reclaimed cobblestones on sand, and how can it be done?
Yes, you can set reclaimed cobblestones on sand for patios or walkways. Start by preparing a compacted gravel base, then spread a 1-inch layer of sharp sand. Lay the stones evenly, sweep sand into the joints, and compact the surface to lock the stones in place.